Guitar CareOne of the things that beginners often miss out on is, simply, how to look after their instrument. It's a bit like learning to drive, but not being shown how to put fuel in, check oil and water, or perform basic maintenance.
We'll start with strings, something that causes beginners (and some not-so-beginners) a lot of problems. We'll add other topics in due course. If you have a related topic you'd like help with, use the contact page to ask your question. |
Strings |
Strings are the single most important topic as regards guitar care.. We'll start by considering a typical steel-strung acoustic guitar, looking at how to remove, then replace, the strings.
|
To ensure the guitar stays in tune and playable, it is necessary to change strings frequently, as corrosion, dirt and string damage will affect the sound and intonation. How often you change is a matter of personal judgement (but strings do not last forever!). What is important is that the strings are put on correctly in the first place. The method is as follows:-
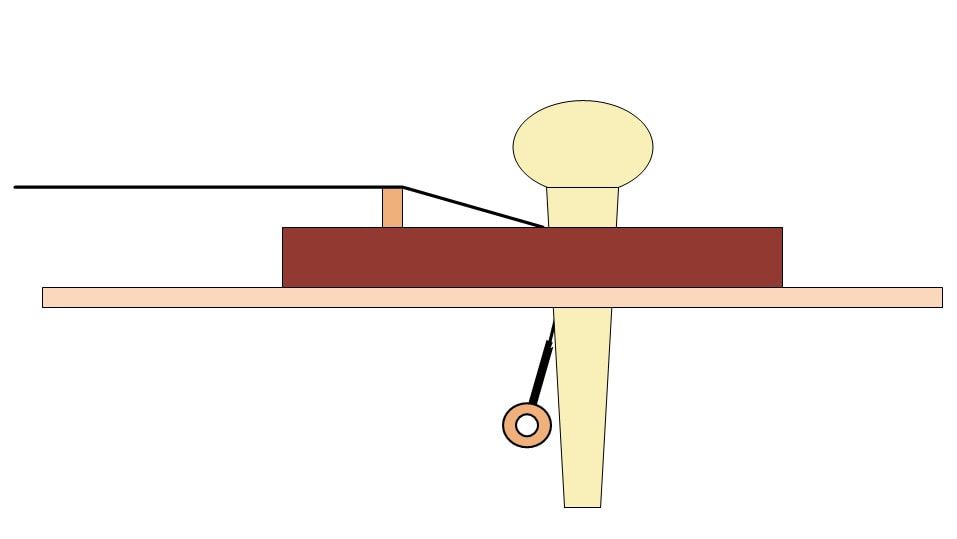
Select a new string, then remove the corresponding old string. Most acoustic guitars use pegs to retain the the string in the bridge. The pegs have a slot in which the string runs. To remove the peg, first slacken off the string and release it from the machine head. Then, holding the string close to the peg end, push it downwards, which will release the load on the peg. The peg can then be lifted out. Some string winders have a notch which allows the peg to be prised out if it’s stuck, but you should rarely have to do this if you can push the string down first.
To fit a string, put the ball end into the peg hole, insert the peg with the slot pointing to the neck, then pull the string back up. The ball end must come up beyond the bottom of the peg, or the string will flip the peg out as soon as any tension comes on the string. Putting a bend in the string at the ball end will prevent the ball end catching at the bottom of the peg.
Once you feel the string is properly placed, firmly pull it upwards while pushing the peg downwards. Don’t push the peg in too firmly, or you’ll have problems getting it out next time.
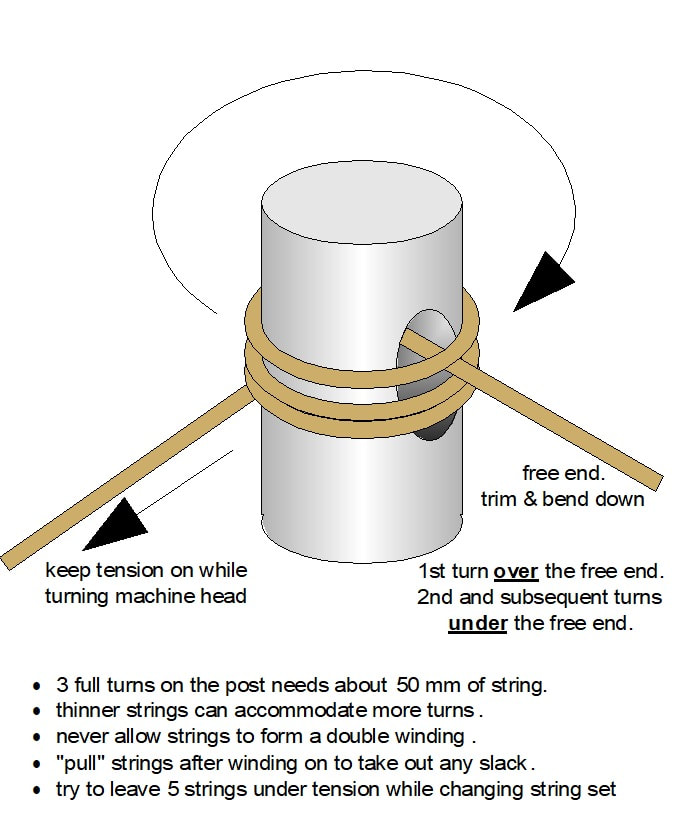
Now check the length of the string against the machine head it relates to. Put a bend in the string about 50mm (2”) beyond the post, then feed the string through the post hole, up to the bend. Use one hand to keep the slack under control, while using the other hand to wind the machine head. The direction of wind should be such that you minimize the angle at which the string approaches the nut. This of course means all strings run to the inside of the posts, not the outside.
Keep some tension on the string while you wind, take the first turn over the free end. As the post rotates, feed the string so that the next turn goes under the free end, locking the string, and continue feeding the string onto the post so that the wrap is tight. Bring the string to roughly the right pitch, then, grasping the the string with your fingers around about the 12th fret (the mid point of the string), firmly pull the string upwards a couple of times, to take out any slackness. Then bring the string back up to pitch. Don’t be too fussy about pitch at this stage, but wait till all strings are on and tight. Now you can fine tune. To finish off, snip off the free ends to about 10mm long or less, and bend them downwards to avoid stabbing yourself – it hurts!
Change your strings regularly (at least twice a year even if you don’t play much)
and your guitar will play and sound better.
and your guitar will play and sound better.


